Categories
Kubernetes

MetalLB Deployment and Monitoring on K3S Cluster

To replicate services like you get in AWS or Azure I prefer to have a load balancer. In my Lab I am Running a AVI load balancer but my PI cluster is running in my Home Network Where I do not have the resources available to deploy a dedicated external Load balancer and for this MetalLB is perfect.

The MetalLB installation is 2 step process. Firstly we will deploy all the resources and in step 2 we will do the configuration.

MetalLB Deployment

The first part can be done as described in the documentation from MetalLB.

sudo kubectl apply -f https://raw.githubusercontent.com/metallb/metallb/v0.12.1/manifests/namespace.yaml
sudo kubectl apply -f https://raw.githubusercontent.com/metallb/metallb/v0.12.1/manifests/metallb.yaml

Awesome, Now we have a new Namespace with MetalLB deployed.

Configuration

For the configuration we need to create a configmap telling MetalLB what IP range it should use. For this we create a new file called config.yaml with the below code.

Modify the addresses to match a part of your network which MetalLB can control. This should not overlap any DHCP scope.

apiVersion: v1
kind: ConfigMap
metadata:
  namespace: metallb-system
  name: config
data:
  config: |
    address-pools:
    - name: default
      protocol: layer2
      addresses:
      - 10.30.0.30-10.30.0.50

and we can apply it with

sudo kubectl apply -f config.yaml

Now we have a functioning loadbalancer

if we have a look at the services we can see that before the deployment the external IP for Traefik was pending. this is because we did not use the serviceLB option when deploying K3S

Before MetalLB

Once MetalLB is deployed and configured we can see that Traefik got an IP from the range we supplied in our configmap

Up Next Monitoring

Monitoring

While doing my research for this project I watch a lot of video made by Jeff Geerling and his Video Series on Pi Clusters was very helpful. As with most open source projects there is a wealth of information out there but the trick is to find the right combination for your project. As part of his project he again piggybacked on some work done by Carlos Eduardo. I use this in all my K3S projects as it just works. So below is the Short of it.

Install the Pre Requisites

sudo apt update && sudo apt install -y build-essential golang

Clone the Project

git clone https://github.com/carlosedp/cluster-monitoring.git
cd cluster-monitoring

in the vars.jsonnet file we need to set the K3S options and also update out URL for monitoring.

Here I set the k3s master node URL as well as the Traefik ingress url

I also enabled the armExporter to get stats for my Raspberry PI’s

Now we can build and deploy the solution

make vendor && make && sudo make deploy

Once the deployment is done you should have access to your dashboard on the URL specified in the vars file

The default username and password is admin and admin

Categories
Kubernetes

K3S Deployment

Setting up the Raspberry Pi’s

This guide is great for the setup up the Raspberry Pi’s and also include the K3S and MetalLB deployment described here.

Once the OS is installed and the Nodes are accessible using SSH we can begin the deployment process

As part of the OS installation with the Raspberry Pi Imager I already set my Hostnames as required

I also Used my DHCP server to assign fixed IP’s to each Pi

SHomeK3SM01 – 10.30.0.10 – Master Node

SHomeK3SW01 – 10.30.0.11 – Worker Node 1

SHomeK3SW01 – 10.30.0.12 – Worker Node 2

SHomeK3SW01 – 10.30.0.13 – Worker Node 3

You can use hostname and ip a to confirm this

ubuntu@SHomeK3SM01:~$ hostname
SHomeK3SM01
ubuntu@SHomeK3SM01:~$ ip a show dev eth0
2: eth0: <BROADCAST,MULTICAST,UP,LOWER_UP> mtu 1500 qdisc mq state UP group default qlen 1000
    link/ether e4:5f:01:0a:5e:1c brd ff:ff:ff:ff:ff:ff
    inet 10.30.0.10/24 brd 10.30.0.255 scope global dynamic eth0
       valid_lft 82137sec preferred_lft 82137sec
    inet6 fe80::e65f:1ff:fe0a:5e1c/64 scope link
       valid_lft forever preferred_lft forever

Preparing OS

Our First task is to get the OS ready to run Containers.

The below needs to be run on all Nodes. As per the Guide mentioned this can be done using Ansible but I Used mtputty to just run it on al 4 nodes at once

sudo sed -i '$ s/$/ cgroup_enable=cpuset cgroup_enable=memory cgroup_memory=1 swapaccount=1/' /boot/firmware/cmdline.txt

Fixing IP Tables can be done by creating a k3s.conf file with the config

echo "net.bridge.bridge-nf-call-ip6tables = 1
net.bridge.bridge-nf-call-iptables = 1" > ~/k3s.conf

now this needs to be moved to the correct path and the correct permissions and owner set

sudo mv k3s.conf /etc/sysctl.d/k3s.conf
sudo chown root:root /etc/sysctl.d/k3s.conf
sudo chmod 0644 /etc/sysctl.d/k3s.conf

If you also dislike IPv6 then append the below to your /etc/sysctl.d/99-sysctl.conf file

net.ipv6.conf.all.disable_ipv6 = 1
net.ipv6.conf.default.disable_ipv6 = 1
net.ipv6.conf.lo.disable_ipv6 = 1
net.ipv6.conf.eth0.disable_ipv6 = 1

Time for a Reboot before we continue.

Installing K3S

Time to start the K3S setup, This is done easily with a Install script and some parameters.

I will start with the single master node.

sudo curl -sfL https://get.k3s.io | K3S_TOKEN="Your Super Awesome Password" sh -s - --cluster-init --disable servicelb

The –cluster-init is to initialize the first node. We also use –disable servicelb as we will be using MetalLB for load balancing.

Give it about a minute to settle. you can check that the node is up using sudo kubectl get nodes

Next up the Worker Nodes. The K3S_URL should be set to the IP of the Master Node you deployed earlier, the FQDN can also be used.

sudo curl -sfL https://get.k3s.io | K3S_URL="https://10.30.0.10:6443" K3S_TOKEN="Your Super Awesome Password" sh -

Now I like to do a watch and just check that all the nodes are up

Great Now we have a nearly Functioning Kubernetes Cluster(still needs a Load Balancer).

To make it look a bit prettier I like to label my Worker Nodes

Labelling Workers

In the next Post we will deploy MetalLB and the Monitoring.

Categories
Kubernetes

Building a Raspberry Pi Kubernetes Cluster for my Home

Overview

Photo by Asya Vlasova: https://www.pexels.com/photo/raspberry-pie-3065576/

I use a few selfhosted services in my Home and because I tend to break my Lab environment weekly these services are running on 2 Raspberry Pi’s and my NAS on the Home side of my Network. But I have, in the past few months, started using more services from my Lab in my Home and I would like to move these to a “Production” Kubernetes environment.

The aim here is to build a Small Scalable Raspberry Pi Cluster to Host my Dashboards, DNS, Monitoring and some other services in my Home network side.

Bill of Materials

2 X Raspberry Pi 4 8GB

2 X Raspberry Pi 4 2GB

Unifi Switch Flex mini

8 Port USB Power supply

Transparent Case

4 X 64Gb Kingston Canvas Select Plus microSD

Hardware Considerations

I installed some small heatsinks on the Pi’s just to lower the temperature a little. They did not overheat but were running close to 80°C and I did not like that.

The cases and Cabling are all aesthetic and as long as the USB cables can supply the power and the Ethernet Cables are Cat 5e it should work.

The Unifi Flex mini was cheapish and sized just right for my initial build.

Software Considerations

I opted to run 64bit Ubuntu 20.04 on the Pi’s. I am comfortable to use Ubuntu and this will also keep the OS the same as all the Servers in my Lab environment. For my Kubernetes Environment I will be using K3S for the ease of setup, I will also use MetalLB as my Load balancer. Storage will be NFS shares from my Synology NAS or local storage.

To Start with the Services I will be running on the cluster include

Central Grafana Instance for Dashboards

PiHole

OpenSpeedtest for internal Performance Testing

Uptime Kuma for Network and Internet Monitoring

Linktree for Bookmark Management

Network Considerations

I opted to put my Cluster in its own VLAN with Firewall rules allowing only traffic out to the Internet.

To allow UptimeKuma to monitor devices in my own network I allowed this traffic on a per Service/IP basis

There is also a rule to allow for my NFS storage to be accessible from the cluster.

The cluster has its own Class C network with Nodes in the range .10 to .19

MetalLB will be able to mange the .30 – .50 space for loadbalancer IP’s

Sources

Categories
vRealize Automation

Code Stream Pipeline Execution Schedule Trigger

We are using vRealize Code Stream to automate some Tasks admins need to routinely do. Last week I ran into an Issue whereby we needed to trigger a pipeline on a Schedule. There are 3 options available natively to trigger pipeline executions but none of then would work for us. I initially thought of using Github Actions to trigger the pipeline thru a webhook but as we are running Code Stream on Prem this ended up and not being possible as detailed in this Blog post.

In the end there were 2 options to do this outside of CodeStream

Cronjob to trigger execution thru the API or using Orchestrator to do the same. Trying to reduce outside dependencies the below was what I ended up using.

The Bundled Action and Code is available here.

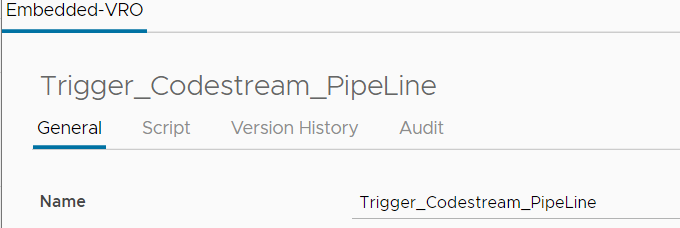
vRealize Orchestrator Schedule Action

I firstly created a new Orchestrator Action to trigger a specific pipeline UUID thru the Code Stream API. For this to work I needed to create the Action outside of Orchestrator due to the requirement to use the requests module. I then bundled the libraries needed with the code into a zip file and import it into orchestrator.

The Action require 4 Named Input variables to function.

  •   vRealizeApplianceURL = FQDN of vRealize Automation Appliance (https://fqdn).
  •   codestreamUserName = Username for vRealize Automation.
  •   codestreamPassword = Password for the user (SecureString).
  •   pipelineUUID = UUID of the pipeline to execute. Obtained from the URL in GUI.

With the action Imported we can go ahead and create a simple workflow which we will be able to schedule.

vRealize Orchestrator Schedule Workflow

For the Workflow I created a bunch of Variables needed by the Action. I created multiple values for the UUID input to allow me to trigger multiple pipelines in every scheduled run.

In the workflow Schema I added a Action element for each Pipeline I would like to trigger. In each element I supply all the details and the variable assigned with the pipeline that needs to be triggered. The only Variable that differ will be for the Pipeline UUID.

The last part is to create the Schedule.

Workaround till we get Native Support

This is not the ideal solution but should work until we get some native support for Timed Triggers in Code Stream.

Categories
Synology The Home Datacenter Company Build Series

Setting up my Synology NAS for my Homelab

Any business or homelab will at some point require shared storage. Even thou there are many solution out there to build your own NAS I found the easy of use and compatibility of Synology or QNAP NAS systems worth the extra initial capital investment, They just work.

I have a Synology DS415+ that came from my Initial first Homelab in 2015 which I decided to use again in this Homelab. It is fitted with only 2GB ram but this does not hamper its performance for iSCSI or NFS which is what I will be using it for,

After the initial install I created a Network bond using the Adaptive Load Balancing option. This will provide failover support, but no real network performance boost as any iSCSI data stream cannot be split across interfaces unless you use LACP tunnels.

On to the Storage. I have 4 Western Digital RED 4TB NAS drives installed. They are not very Fast so to get a little extra performance I opted for RAID10. This will give me a little Write and quite a bit more read performance. My NAS workloads will primarily entail reading Templates and Images for deployments.

I opted for 2 iSCSI LUN’s Totaling up to about half my Total Capacity. I will use Thin Provisioning on the VMware side. Thin on Thin is a nightmare to manage.

I created 2 iSCSI Targets on the NAS. The default and a Routed Target. This was more of a legacy config as I used to run my NAS Links to 2 separate switches and then use multipathing in ESX to ensure traffic stays local to 1 switch. In my new Lab design this is not needed anymore as the Traffic volume will be low.

As a last part I will need to create host groups but that will only be done once all esxi hosts are up.

I also Installed Active Backup for Business to allow me to later perform backups of my Lab environment.

Another step would be to setup a NFS share for my ISO images. The NFS share is only open to the management network of my ESI hosts

And Lastly I enabled the NTP service. I will set all devices in my Lab to sync to this NAS to keep time constant.

The IP will form part of the DHCP option set on most DHCP Scopes defined.

Now we have NTP / Backups and Storage sorted for the Lab. Time to Deploy the First Host

Categories
HomeLab The Home Datacenter Company Build Series UniFi

Setting Up my UniFi Dream Machine for my Homelab

The UniFi Dream Machine might not be the Ultimate Firewall for your homelab. pfSense might be more Hands on, or running a Palo Alto of Cisco Firewall more Enterprise like. But the Dream Machine does have all the features I require, Good Support and a Pretty Interface.

The Home Datacenter company also considered all there options and in the end the CIO/CTO/CEO and Wife decided UniFi will do the Job.

I started of by following the Deployment guide to get my Dream Machine up and Running. With my Dream Machine and two Unifi switches setup It was time to create the Networks.

I started of creating only the Necessary Networks.

Management / Default – Used as Management VLAN for Switches and Network Devices
  • Subnet: 10.11.12.0/24
  • Gateway: 10.11.12.10
  • DHCP Scope: 10.11.12.15 – 10.11.12.35
THDC-Infra
  • Subnet: 10.70.10.1/24
  • Gateway: 10.70.1.1
  • DHCP Scope: 10.70.10.200 – 10.70.10.254
THDC-AD
  • Subnet: 10.70.11.1/24
  • Gateway: 10.70.11.1
  • DHCP Scope: 10.70.10.20 – 10.70.10.254
THDC-vSphere
  • Subnet: 10.70.12.1/24
  • Gateway: 10.70.12.11
  • DHCP Scope: 10.70.12.200 – 10.70.12.254
THDC-vMotion
  • Subnet: 10.70.14.1/24
  • Gateway: 10.70.14.1
  • DHCP Scope: 10.70.14.200 – 10.70.14.254
THDC-iSCSI-Routed
  • Subnet: 10.70.15.1/24
  • Gateway: 10.70.15.1
  • DHCP Scope: 10.70.15.200 – 10.70.15.254
THDC-vRealize
  • Subnet: 10.70.13.1/24
  • Gateway: 10.70.13.1
  • DHCP Scope: 10.70.13.200 – 10.70.13.254

Security

The next part was to setup my Default security for my Lab. At this time I did not setup any DMZ’s and also no firewall rules between Subnet. I would be a good idea to do the inter subnet firewall rules at this time then you do not need to go back an retrofit them. But another lesson learned on my side as I did not do it.

I used the UniFi Dream Machine Default Sensitivity Setting on High for my Lab. This still allow for nearly Max Speed on my ISP connection

I also Deployed some Internal Honeypot’s to find any Dodgy stuff I deploy in my Lab.

We are now ready to start deploying Hosts and Services. I will need to come back to the network config to change all VLAN’s DHCP setting to distribute my Own DNS Servers but as we do not have them yet I left it out for now.

In Part 2 We will look at setting Up my Synology NAS to Supply Storage and NTP Services.

Categories
HomeLab The Home Datacenter Company Build Series

The Home Datacenter Company

Starting a new business(Homelab) is not an easy task. Part of the tasks that might fall into your area. The IT infrastructure for a new Business is challenging. Budgets are generally small, Skills are expensive, time is tight and requirements are ever changing.

a Lot of startups might choose to go directly to the cloud. This might be a quick and easy option as they already took care of the infrastructure. What we will do thru the next few post is build the infrastructure side. In the end I would like this to resemble the infrastructure of a cloud. User should just as easily deploy there new applications on premises as they would be able to do it in the cloud. We will Thus be Building The Home Datacenter Company to showcase this option.

Excluded from the scope would be Email. I personally prefer cloud email services and also hosting email in my Home Lab is a headache.

Outline

  • Part 1 – Network setup using Ubiquity UniFi Gear.
  • Part 2 – Setting Up Synology NAS for Storage and Services.
  • Part 3 – Deploying Management Node(ESXi Install).
  • Part 4 – Deploying Active Directory.
  • Part 5 – Deploy and Setup Virtual Center Server.
  • Part 6 – Create vSAN Cluster.
  • Part 7 – Microsoft Certificate Services.
  • Part 8 – Deploying vRealize Stack.
  • Part 9 – Setup Server Provisioning.
  • Part 10 – Deploying K3s Cluster for Applications
  • Part 11 – Setting up Internal and External Web Endpoints.
  • Part 12 – Going live Online. (Blog Proxied thru Cloudflare from OnPrem).

Hardware Requirements

I chose to use a mostly VMware toolset for the deployment as I am familiar with it. This also meant that I tried to stick as close as possible to VMware Hardware Compatibility List. For Active Directory I chose Microsoft Active Directory and to make my life a bit more Challenging I used the 2022 Insider Preview. Who does not want some additional crashes and compatibility issues.

The total lab build took around a week. Most time was spent waiting for things to happen. I also have a life and job so saying a week refers to some after hours and weekends mostly.

This was mostly a fun way of answering the “But Why?” question for any homelab.

The Home Datacenter Company has only a single mission in Life “Show the World the NGINX test Page” :-).

Mission of THDC
Categories
HomeLab

Homelab – Services and Software

In the final installment of this series I would like to go thru some of the software used in my homelab and how they are used.

The following few posts I will go thru the Setup and Building of all the solutions mentioned here.

I started with ESXi 7U2 deployed on all 4 of my Hosts. My host used as a Management cluster will host the below.

  • Windows 10 VM: Used as a Jump Box to manage my lab from. All the software and tools will be installed here. everything can be done from my Laptop as well but I prefer this route to keep my lab portable / standard even when my own tools change.
  • Windows Server 2022: This will be my primary Active Directory Server. DNS will also run on this DC.
  • Windows Server 2022: This is used as my Microsoft Certificate Authority
  • Virtual Center Server Appliance: Virtual Center to manage my Lab from.

All 3 servers are hosted on the internal SSD and set to Auto start on host startup.

I then Setup my Synology NAS. I used 4 x 4TB WD Red Drives configured in RAID10. My NAS Hosts the below Services

  • NTP for my LAB
  • iSCSI Storage for VM’s
  • NFS used for Kubernetes and also ISO images. I also have a NFS Share which Hosts the VMware Content Library.
  • Active Backup for Business used for backups of All Critical VM’s.
  • Web Server Used for distribution my Proxy .wpad file.
  • Internet Proxy Server

Next up was the 3 Node vSAN Cluster, Also using ESXi 7U2. these were added to my virtual center using dns names.

I moved all networking to two separate Virtual Distributed Switches one used for normal traffic and the second for vsan.

Now it was time to get some redundancy up for my Domain controller adding a second Windows 2022 server.

At this point we have all the core components in place to start building our business. Initially I will also, at this point, build myself a few Templates for Ubuntu and Server 2022 just to make my life easier later on, I will in a later post show how this can be automated.

To make the lab more functional I need some additional tools. First of which would be VMware Lifecycle manger to assist with the deployments of all other tools. I then Go ahead from there to deploy;

  • vRealize Operations manager – Monitoring and Troubleshooting
  • vRealize Log Insight – Central Log Management
  • vRealize Automation – Automating everything
  • vRealize Saltstack Config – Configuration Management for servers

Once vRealize Automation is setup and usefull I deployed 6 Ubuntu VM’s to be be used as Docker hosts for the below

  • Services Host:
    • Portainer for Docker Management GUI
    • UptimeKuma for Internet and Services Monitoring
  • NGINX Proxy Manager for reverse Proxy and SSL Certs
  • Harbor Container Registry

The other 3 Docker VM’s are used to play around with different applications

And finally time to get some Kubernetes Clusters up. I used Ranchers K3s to build a 3 Node cluster for “testing” and also spun up a Tanzu Community Edition cluster for “testing”.

That is my Homelab. It should allow for any testing I need to do for Work or Home use. I use various Tools at different times as I learn new things or hear about a project I find interesting. If this was a Business it would be ready to get departments to deploy their applications. There are still security tools missing and few tools used in Enterprises which does not make sense for me to run in my Homelab due to their massive resource requirements or dependencies.

Categories
HomeLab

Homelab – Network Design

For my Homelab Network Conceptual Design I split my Home into two Zones, each behind its own firewall. On the Home side I would segregate Devices in to 3 Categories.

  • Dodgy – This would mean devices I do not not trust at all, so any IOT device which I do not have control over. They would only be allowed to talk to the internet and use my PiHole for DNS.
  • Dodgy but have to live with it – This would be device that need either multicast traffic to other networks or reside on a open vlan to function. These include services like Plex or even Phillips Hue. The network would be Controlled with minimum access allowed to my Secure Network.
  • Secure – This is where my Laptops, Phones and NAS Reside.

Lab Network

For my Lab network I would try to replicate a Corporate network as close as possible. I would segregate and group traffic based on function or broadcast domains. I would also create two internal DMZ VLANs that hairpin thru the firewall. One would be used for External Services and one for Internal services(Testing before moving it external)

I allocated Subnets in the 10.70.0.0/16 range to my Homelab. I would then sub assign these in groups of 10 Class C subnets to each Larger Group ex. 10.70.10.0/24 to 10-70.19.0/24 would be allocated to Management VLANs. I would then go down in each of the App/DB/Web Groups and allocate /26 networks to each of Dev, Test and Prod. I would also reserve some smaller scopes for dedicated VLAN’s for stuff like TKG or vRealize.

In a proper network there would be firewall rules in place to separate all of the above but I am a bit too lazy to do that yet. IP addressing is handled by the UniFi Dream Machine and the Scopes are defined to distribute the DNS IP’s of my Microsoft DNS Servers as well as NTP which is running on my Synology NAS.

DMZ

As far as the two DMZ’s go they are properly Firewalled off from the rest of the environment with outbound rules only created on a per IP and Port basis as needed. There is a Port Forward Rule on the Dream Machine which will forward port 443 traffic to a Instances of NGINX running as a Reverse Proxy in the DMZ, that means all traffic into my Lab will always originate from that Point. I am also running some other Load balancers/ WAF/Reverse Proxy solutions in the DMZ for Testing.

The Internal DMZ has the same Firewall rules but the inbound traffic will be from my Home/Lab and use internal DNS Entries and Certificates. this allows me to test firewall rules and solutions internally before exposing them to the internet.

In my Lab I do not use any DNS filtering like PiHole or Adguard but I do still block outbound DNS to ensure all services use my internal DNS. All server do have Internet access just for ease of used. I do have a Proxy server running on my Synology NAS but this is currently not used anymore. My DNS is still setup to supply the necessary details on some DHCP scopes but I have moved away from the proxy Solution.

Storage

iSCSI and NFS Storage is running over the Management network currently as I only have two very unutilized VM’s using iSCSI. NFS is mostly used to store ISO images and as Shared storage for my Kubernetes Clusters. My vSAN Network us running on a single non routed subnet local to my Cisco SG300. There is two uplinks per hosts but only a single switch, which luckily never restarted on its own. This is to be changed when doing my 10GB SFP+ upgrade.

Backups are also running over the management networks to my Synology NAS.

I have a VLAN created for Remote access VPN with the intension of expanding my Homelab into either Azure or AWS but currently the cost of running the VPN devices in either cloud is a bit too high.

Up Next will be a Summary of what will be running in My Lab

Categories
HomeLab

Homelab – Physical Design

The design of my new home network design was guided by the requirement for Internet stability and Segregation between HomeLab and Home Network as far as possible.

Home Networking Design

I decided to have my internet come into my Firewall for the Home Lab. This was to ensure that when I do decide to Expose services to the internet my Attack surface for my Home would be Reduced due to the 2nd firewall between my Lab and Home Network. Part of the risk I still have would be Man in the Middle attacks which reside in my HomeLab. To mitigate this I would run all my Home Network traffic thru a VPN service with the connection established on my Internal Firewall. An added benefit is that all Lab service are Internet Side of my Internal Firewall and I do not need to VPN into my Lab.

The second Firewall is a Dream Router sitting downstream from the Dream Machine in my Lab

My Home network has Wifi From the Dream Router Covering half of the house and the other half covered by a Unifi Nano HD. Every room has a Network Point cabled from the Central Switch which reside in the same Closet as the Dream Router, from there I use the small unifi mini switches to my devices. I prefer to used Cabled over Wifi where possible

Storage

My NAS is used as a Backup location for Our PC’s as well as a Media Server using Plex. I also use my NAS as a Intermediary between Cloud Storage we use in Dropbox/Google Drive/OneDrive and a long term backup in AWS Glacier. We have our most important Data in each respective cloud as well as on my NAS locally. a Subset of Really Important Data (Family Photos etc..) are being backed up to AWS Glacier.

DNS

DNS for my Home is Provided by 2 Raspberry Pi’s running PiHole. Both are running in Docker with domain forwarding setup for my Lab Domain to enable me to resolve hostnames in my lab from my home network. DNS is supplied by DHCP from the Unifi Dream Machine and all traffic on port 53 are blocked in my network except to my own DNS servers.

I run a small 4 Node K3S cluster on a set of Raspberry Pi’s on my Internal network. Not sure what to do with them yet as I tend to break them every Time I touch them.

HomeLab Networking Design

From my Dream Machine in the Lab I Use one Physical port for my Downstream Dream Router and my Home. Two ports from the Dream Machine are used as Uplinks to my two 8 Port Unifi Switches and the Last port is the Uplink to my Cisco SG300 used for Out of Band Networking.

There is ISL between the two Unifi Switches with RSTP value lower than the uplink to the Dream Machine. This was done as the Switch in the Dream Machine does not seem to support Jumbo Frames.

Each host and my NAS is Patched to each Unifi Switch. Additionally the three Workload Nodes have two Nic’s Patched to the Cisco Out of Band Switch which is used for vSAN traffic.

All caballing is done using flat Cat6 cables and at this time is still a real mess.

Future Plans for my Homelab Networking Design

I have a 10GBe upgrade planned as Budget opens up and Time is allocated. I will be replacing the Cisco SG300 with a set of 4 port Microtik 10GB Sfp+ switches. Which will have its Own ISL and uplink to the two Unifi switches. My vSAN and vMotion traffic will run over the 10GB network an I will keep my VM’s on the 1GB.

Conclusion

Ensuring that I prevent any Dependencies on my Homelab from my Home network upped the WAF(Wife Acceptance Factor) a lot. I currently only need to schedule a maintenance window if I need to update the Firmware or Software on the Unifi Kit. The Dream Machine does have a Small network drop when modifying or creating VLAN’s but on the wired connection this is only a single ping. But for the WiFi this causes a disconnect. Because the Downstream Dream Router is Wired there is nearly no impact. I bravely Tested this during one of my Wife’s Video Calls and the fact that I am writing this now, is proof that it works.

Next up we will look at how it all pieces together.

Exit mobile version